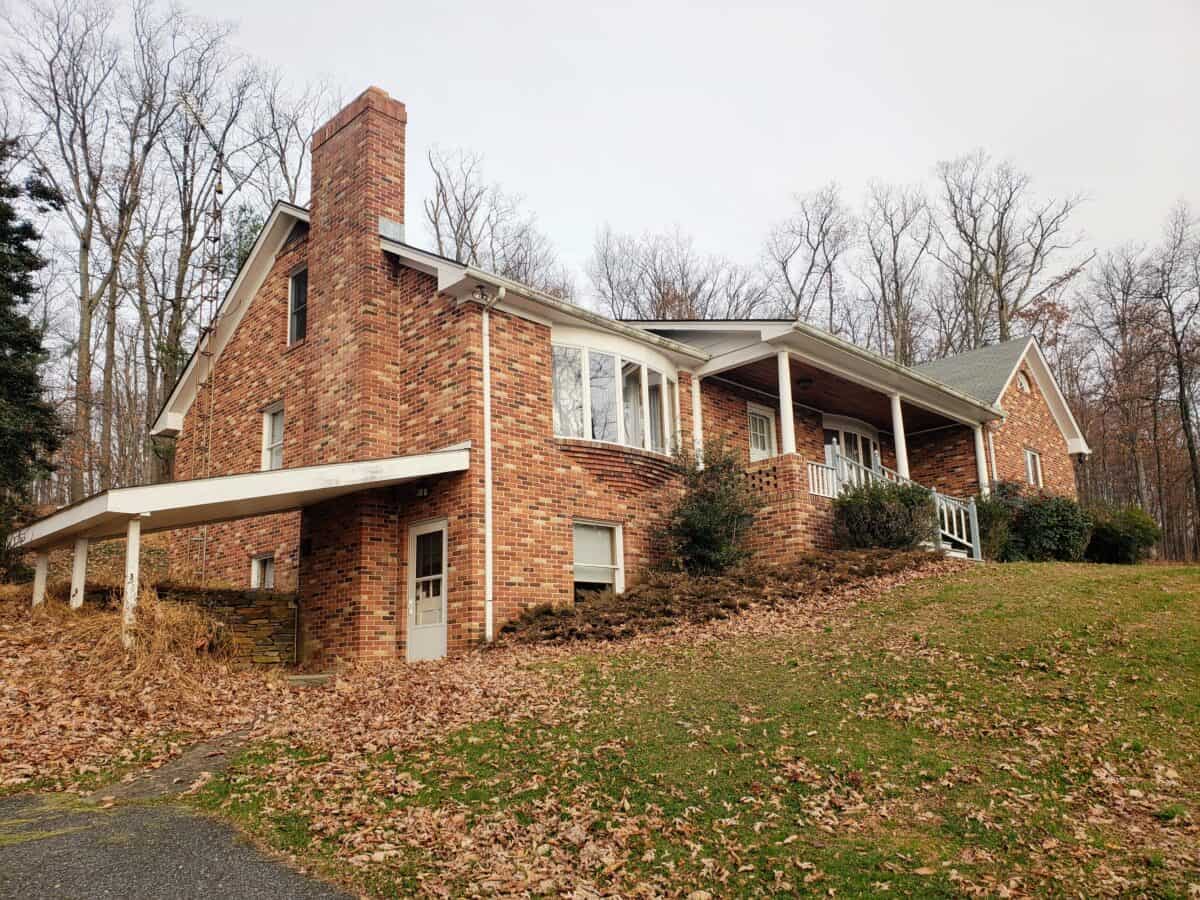
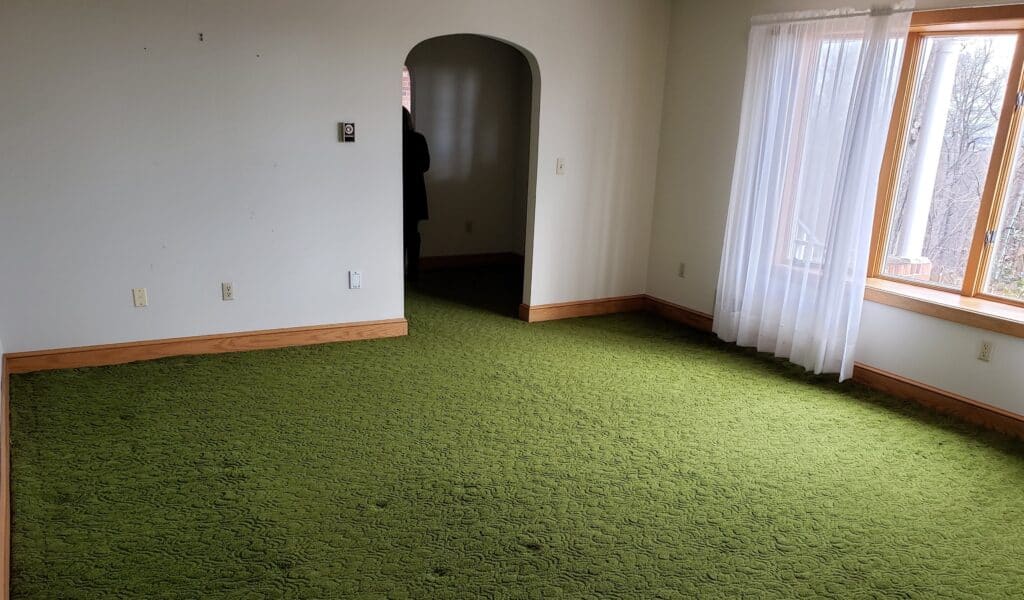
Okay, confession time. Before I was a REALTOR®, I was the girl standing in a 1970s brick rancher looking at green carpet, floral wallpaper and a hand-painted picket fence in the bathroom, saying, “Oh, we can totally work with this.” 😂
And we did! Our 1970s rancher renovation started in 2019, and we took that house room by room, from dated to done. It is still one of my favorite stories to tell, and people ask me about it all the time (“Wait, you did what to the attic?!”). So I finally put the whole thing in one place: the before, the after, the plans, what it actually cost (real numbers!), and everything I learned along the way.
Grab a coffee, because this one is a journey. ☕
Why We Said Yes to a Dated House
Here is what we saw past the wallpaper: This house was literally touching property lines with our very best friends in the whole wide world. It was so different from the .25-acre lot we were used to, and Jon had dreams of riding 4-wheelers and plowing snow…
Brick ranchers from this era can have really solid construction and simple, single-level layouts, which gives you a lot of room to play. We also knew going in that “dated” and “broken” are not the same thing. Paint, flooring and cabinets are cosmetic. A roof, foundation or HVAC problem is a whole different conversation.
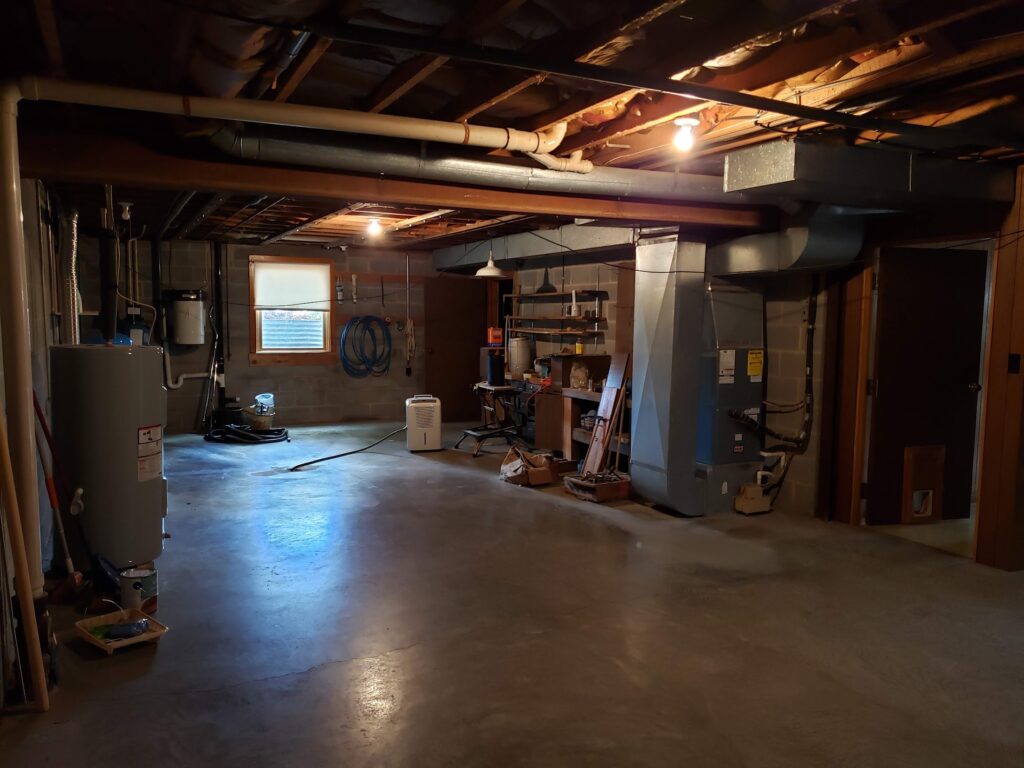
The inspection was overall what was expected for a 1970s house. The HVAC was in need of replacement, we were already ripping off the roof, and the electrical… have you ever heard of radiant ceiling heat?! Yeah… it’s a thing. Due to the size of our renovation, we were expecting to take on this kind of stuff, so nothing was horrible. No mold. No rodent infestation (only old mouse poop).
The Plan: How We Mapped Out Our 1970s Rancher Renovation
Before a single cabinet came down, we had an architect draw up a plan for how we wanted the house to live. Our builder set us up with his main man; we talked through what we wanted, and after a few tweaks, we had a plan…
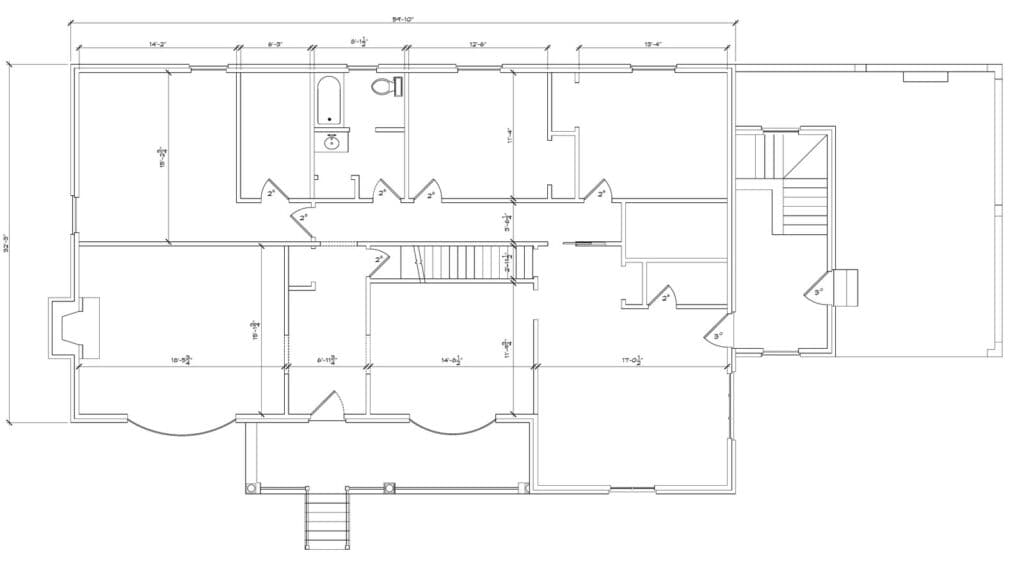
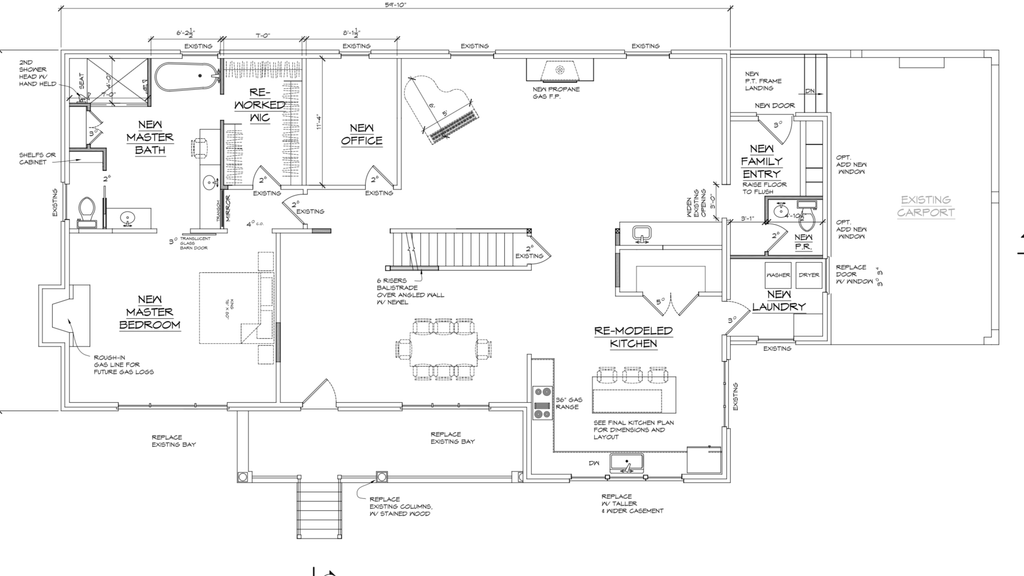
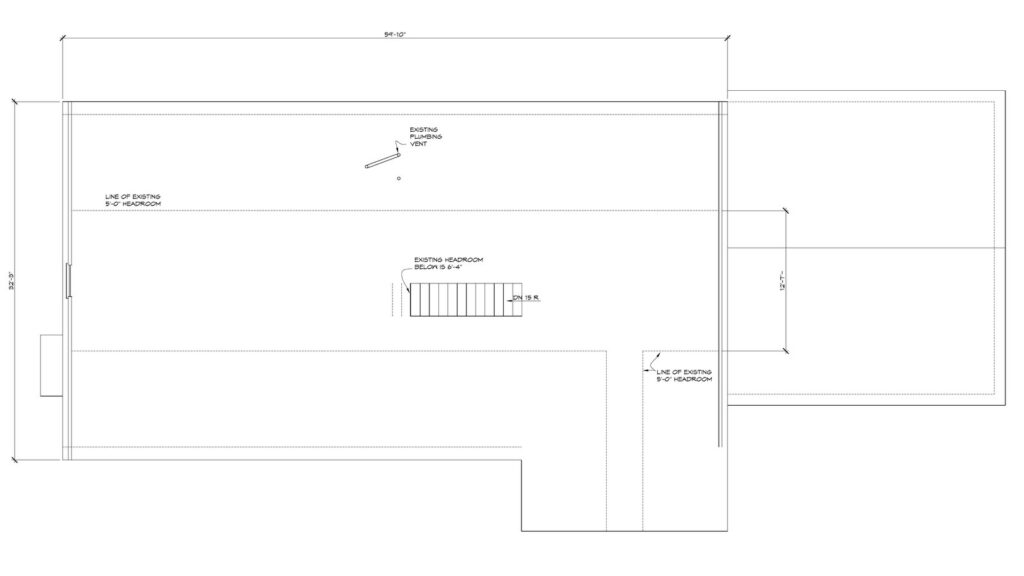
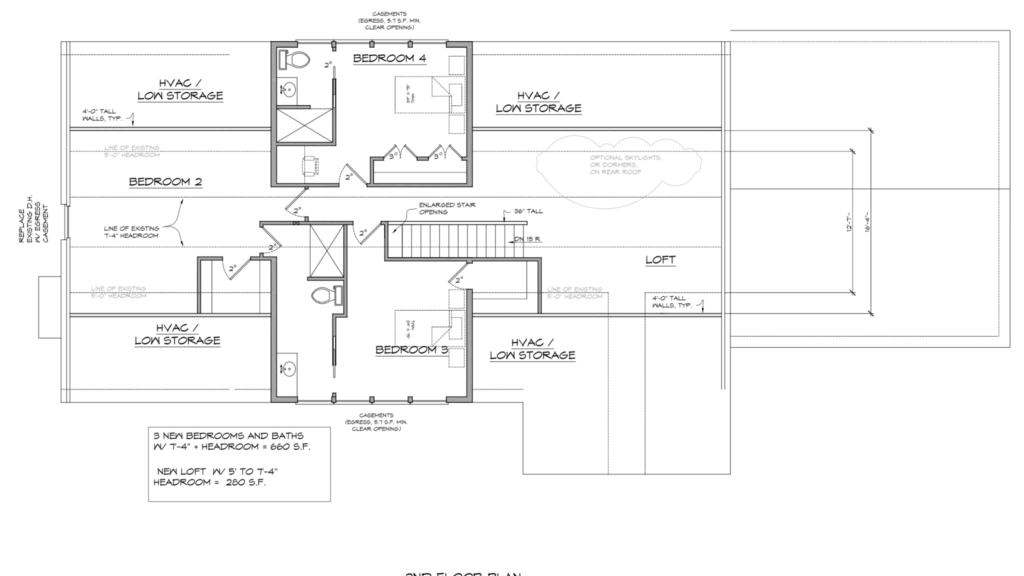
The big moves were:
- Open up and brighten the kitchen so it felt like the heart of the house
- Turn the unfinished attic into real living space
- Rework the primary suite into a bedroom-and-spa-bath combo
- Rework the hall bath and entry so the whole house felt cohesive
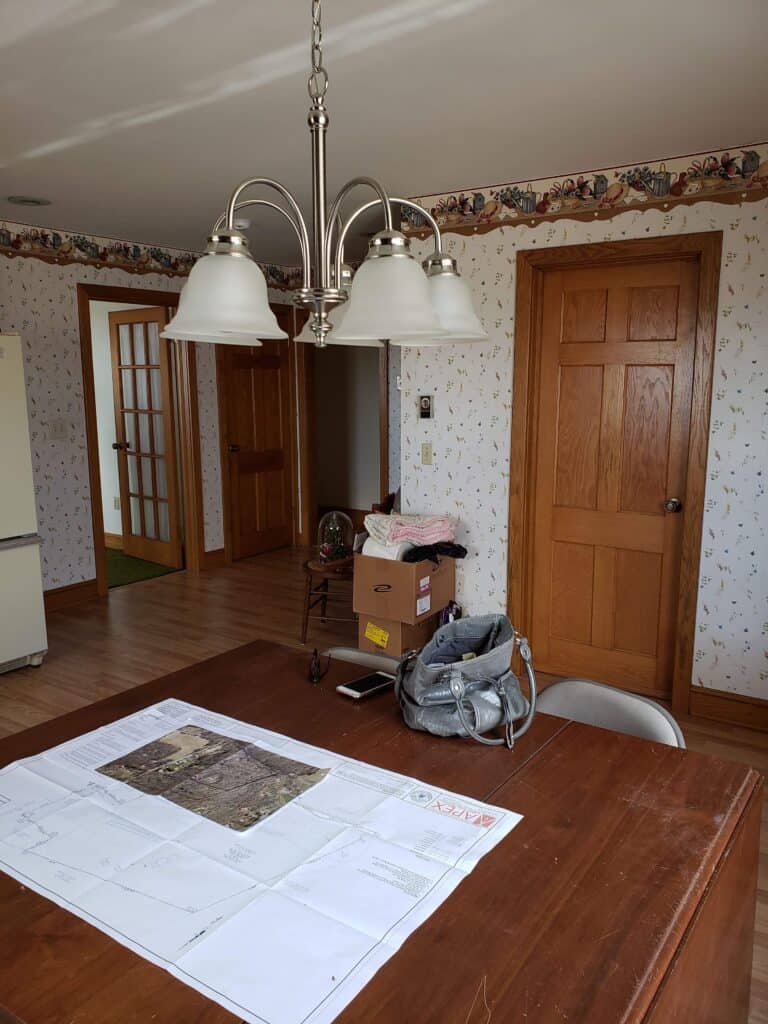
Where it all started: the plat spread out on their old dining table. How were we actually going to do this? How can we save money? What can we do ourselves?
Funny side note: The original owners were so attached to those cabinets that they asked if their own contractor could come remove them. YES. Please. Money saved! Lies; it was a nightmare. They were SUCH good quality that we couldn’t find a single screw hole, which made everything significantly more difficult. 😂
The Kitchen: From Cherry Everything to Bright and Open
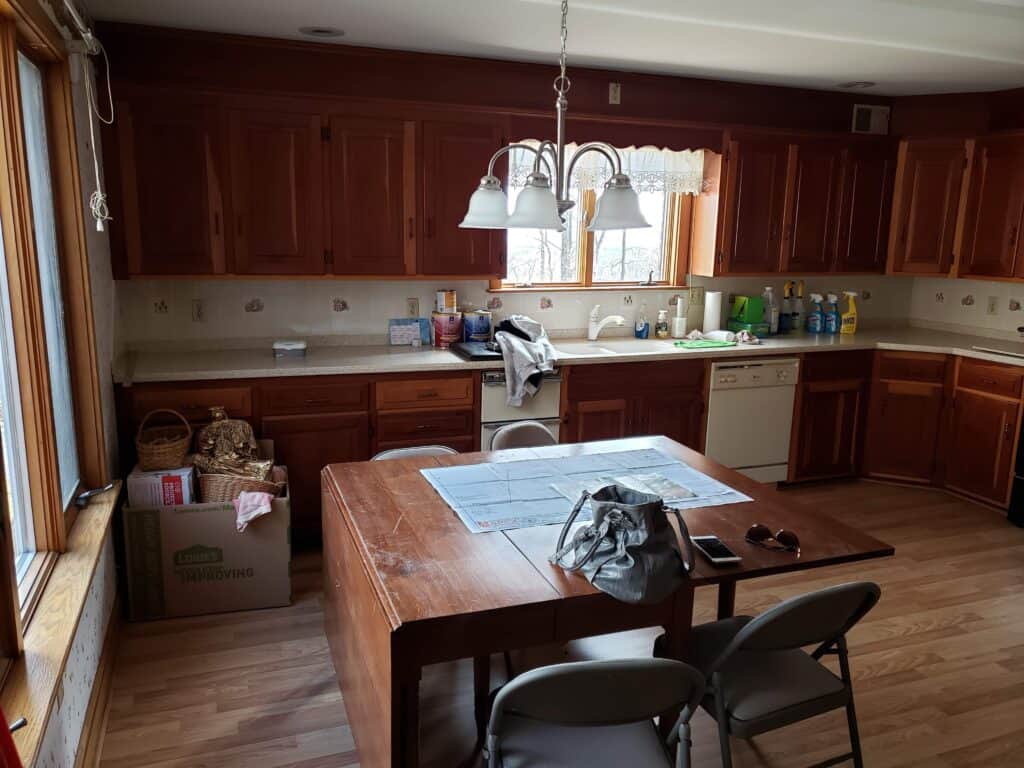
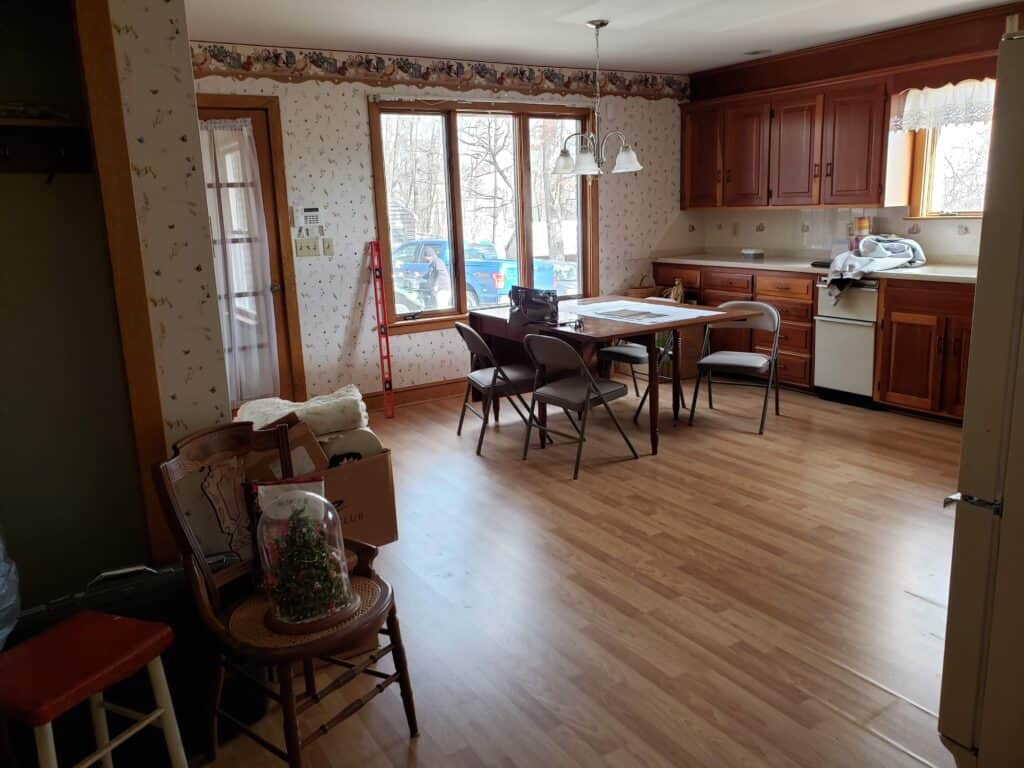
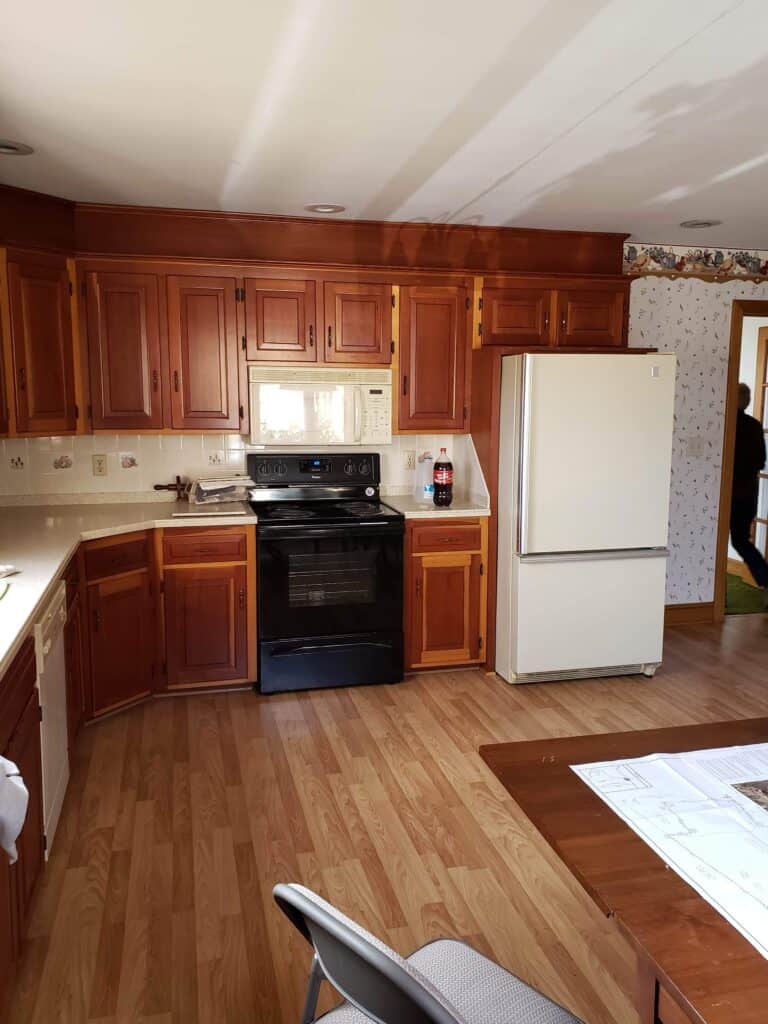
Before: Dark cherry cabinets top to bottom, a busy backsplash and a kitchen that felt dark. It worked, but it was not a room you wanted to linger in.
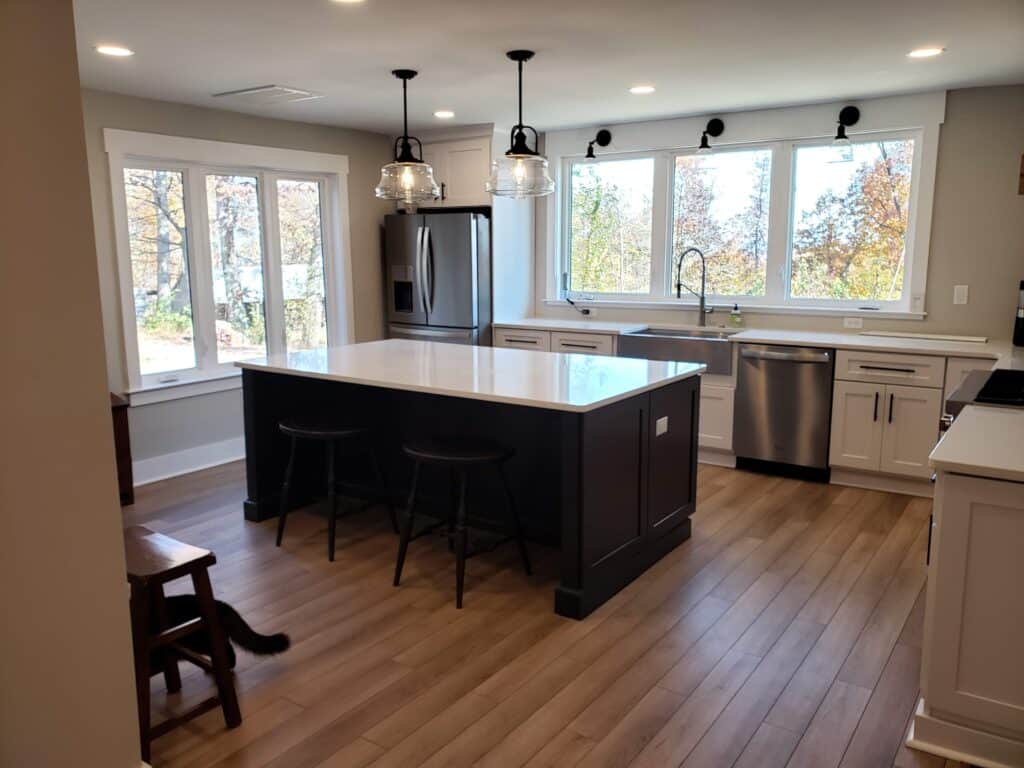
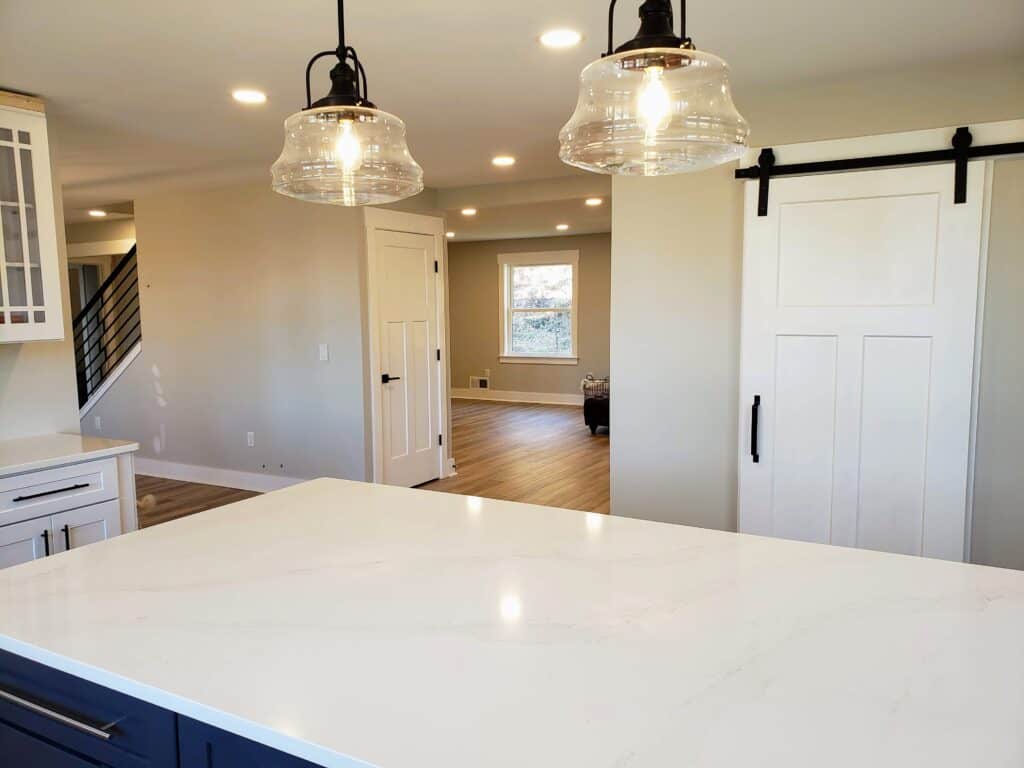
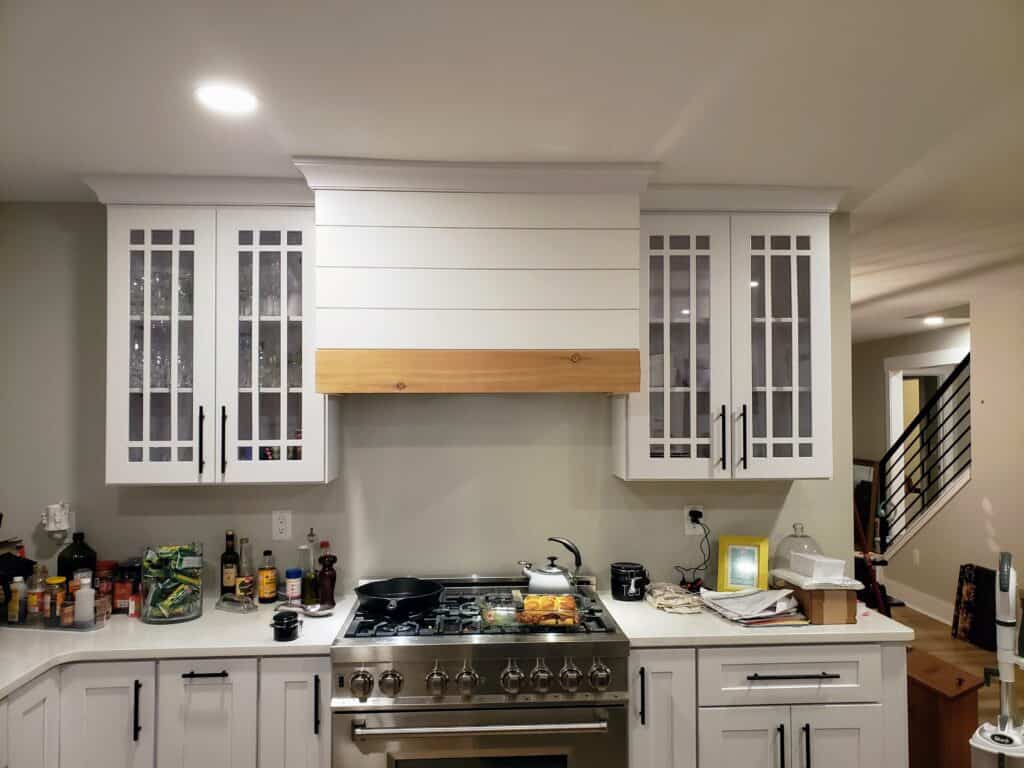
After: White shaker cabinets, a big navy island with seating, glass pendant lights, a farmhouse sink under the windows and stainless appliances. We let that wall of windows be the star, and now the whole room glows with natural light.
The Attic: From Rafters to Real Living Space
During: yes, the roof came all the way off. 😳 Watching the new dormers go up was when it finally felt real.
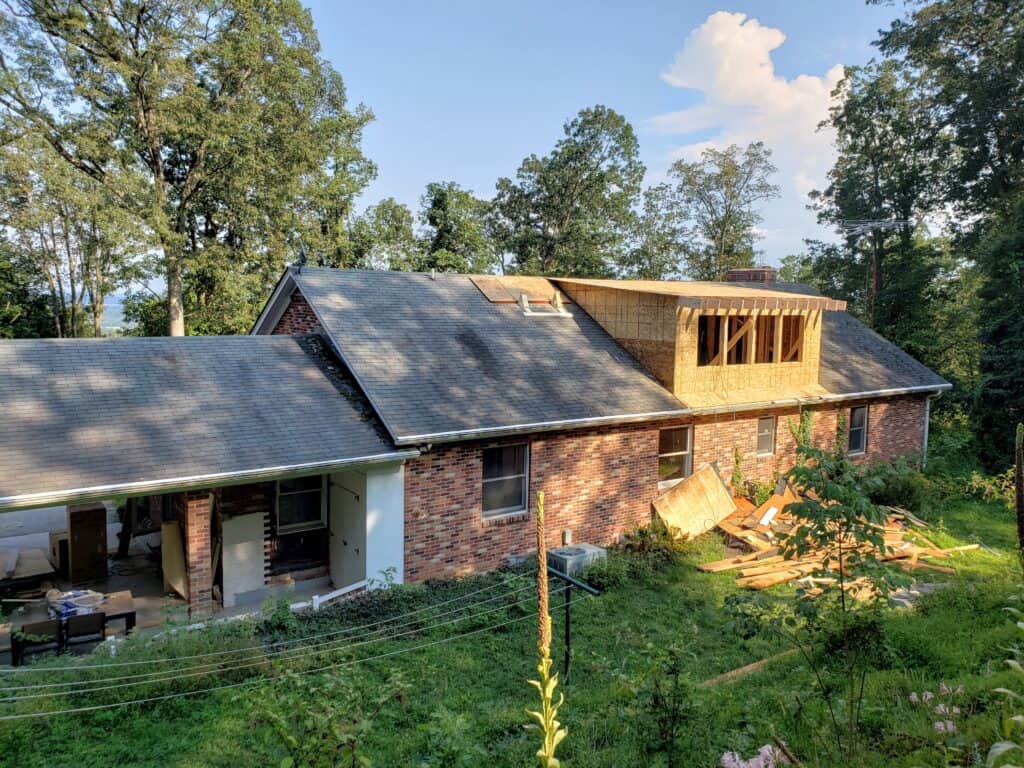
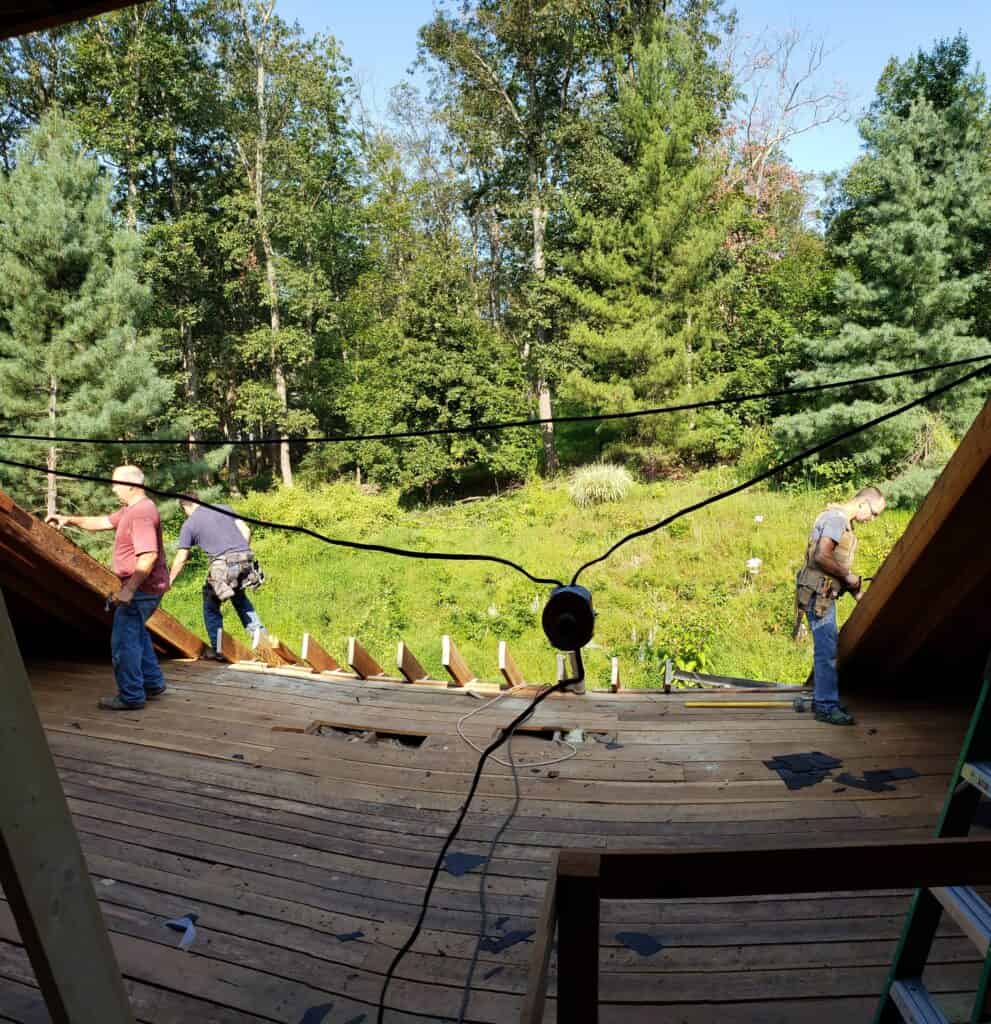
This is the one that makes jaws drop. 🤯 The one thing I will never forget is the smell. It smelled just like my great-grandmother’s attic. Immediate smack to the face. It almost sold me with just that.
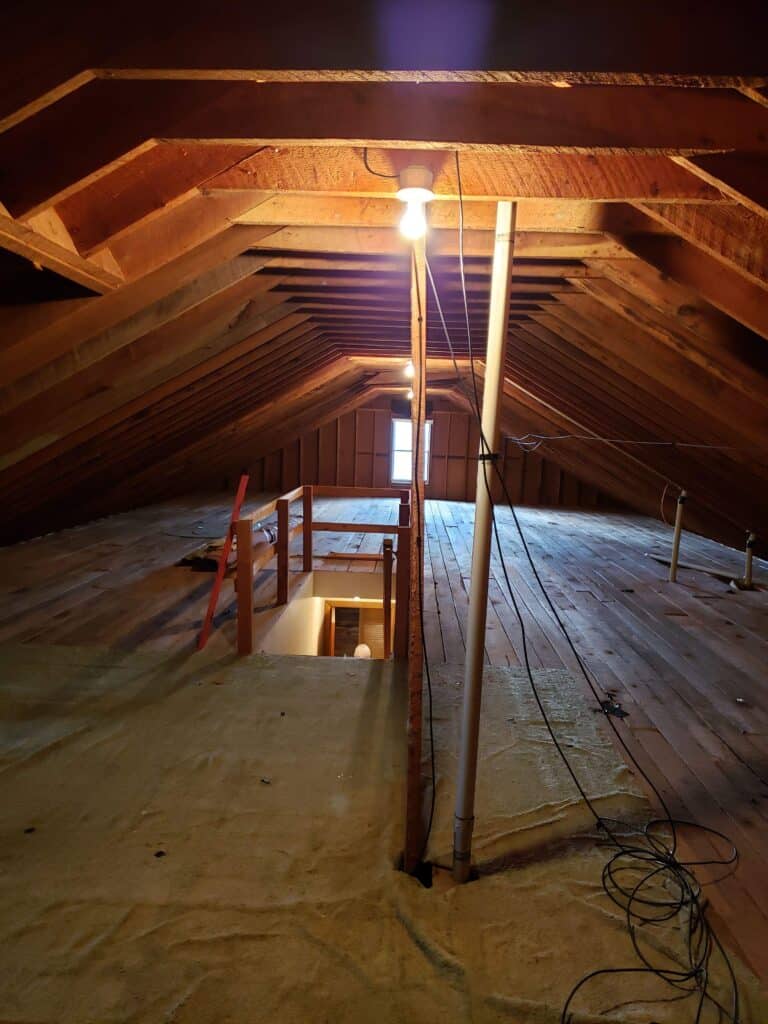
Before: Bare rafters, rough plank floors and a stair opening with a makeshift railing. Storage, and that is being generous.
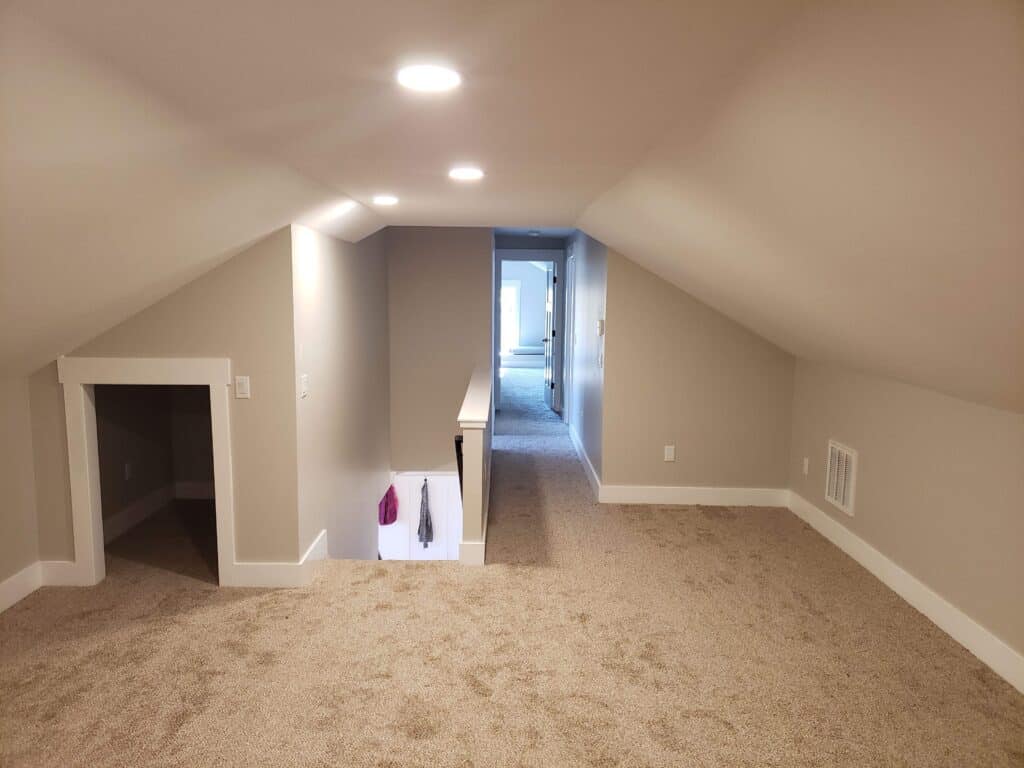
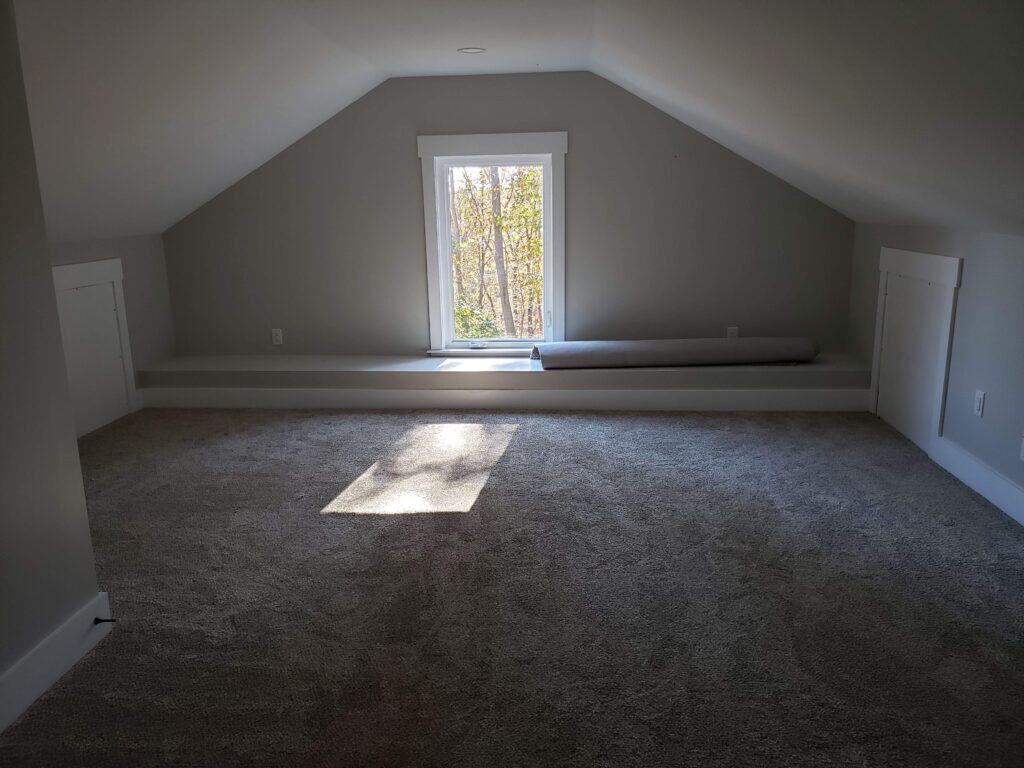
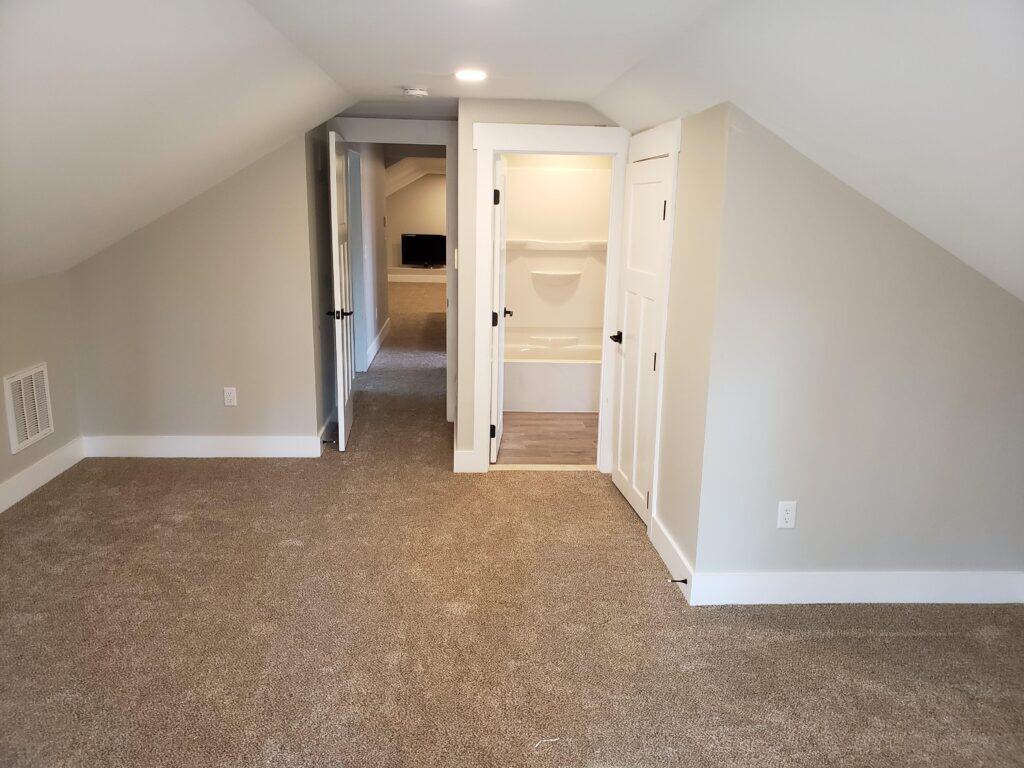
After: A finished room with carpet, recessed lighting, drywall, trim and a real hallway. It went from a place you avoided to a space you actually want to hang out in.
On paper, the plan turned that dusty attic into three new bedrooms with 2 new full baths plus a loft. Not bad for a space that used to be storage!
What I would tell you: Turning an attic into living space is a big project. Structure, insulation, ceiling height, egress and permits all matter, so talk with a licensed contractor and your local permitting office before you dream too hard.
The Hall Bath: Goodbye, Picket Fence 😂
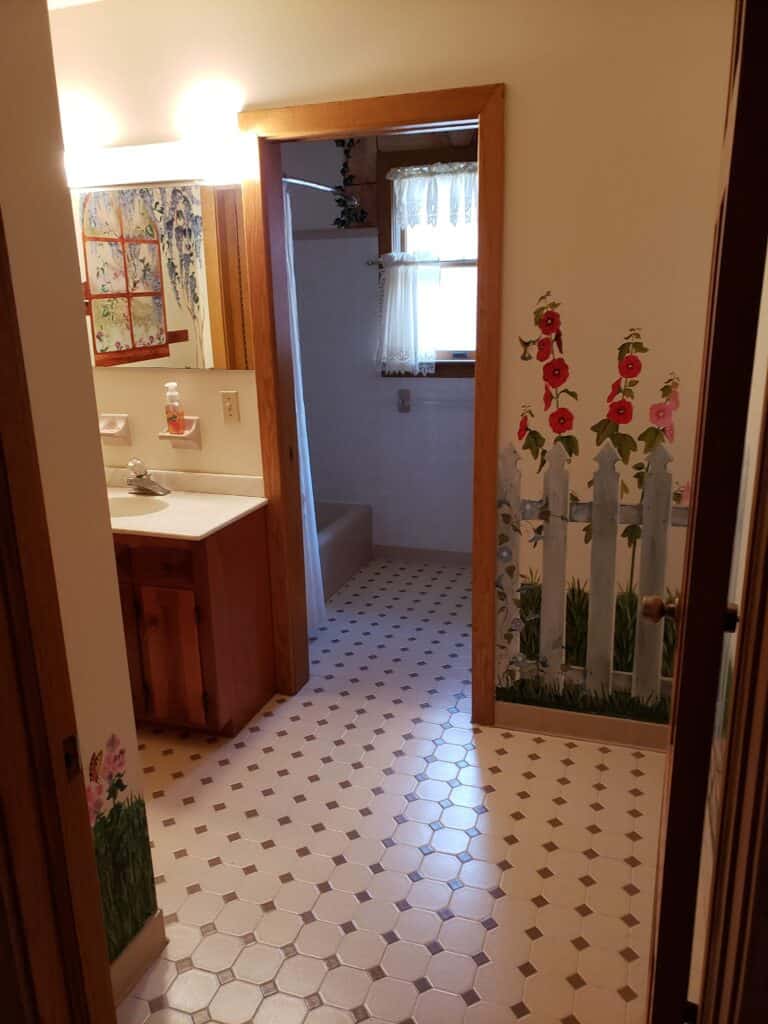
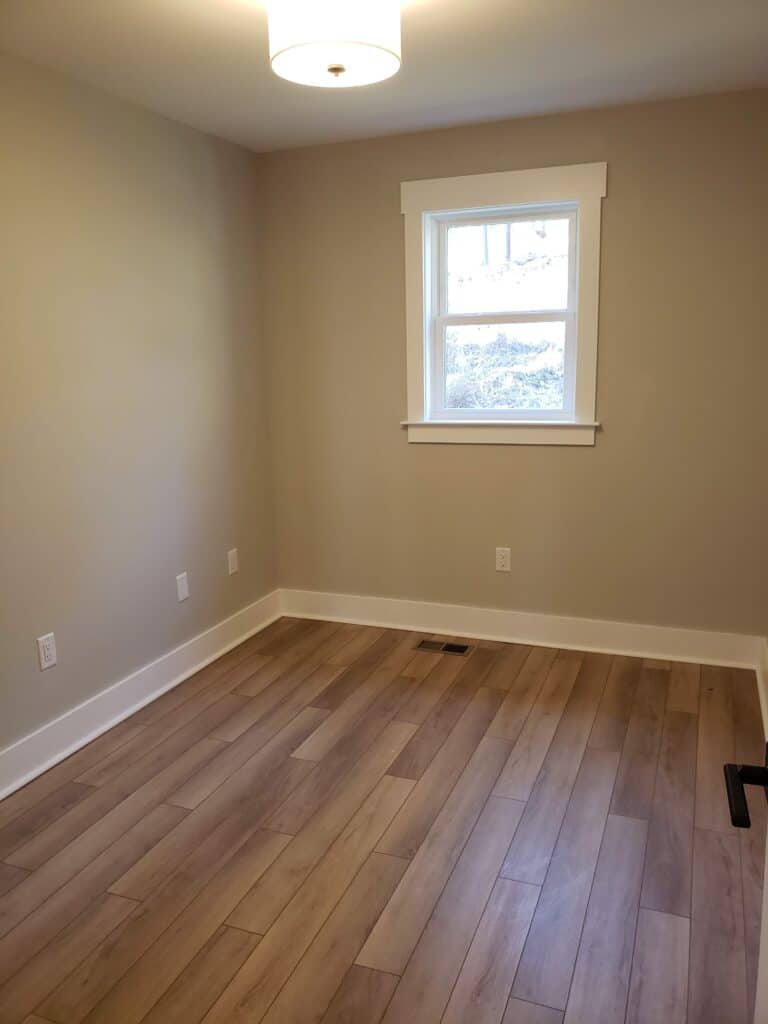
Before: A honey oak vanity, asbestos tile floors (always leave testing and removal of materials like that to licensed pros!), and, yes, a hand-painted picket fence with flowers climbing the wall. Someone loved that mural. That someone was not us.
After: This room became my office, but in retrospect, it 100% should have been the laundry room. The plumbing was already there, the room was the perfect size, and I didn’t use it the way I should have. Little things like this, you learn along the way.
The Primary Suite: A Bedroom Becomes a Spa Bath
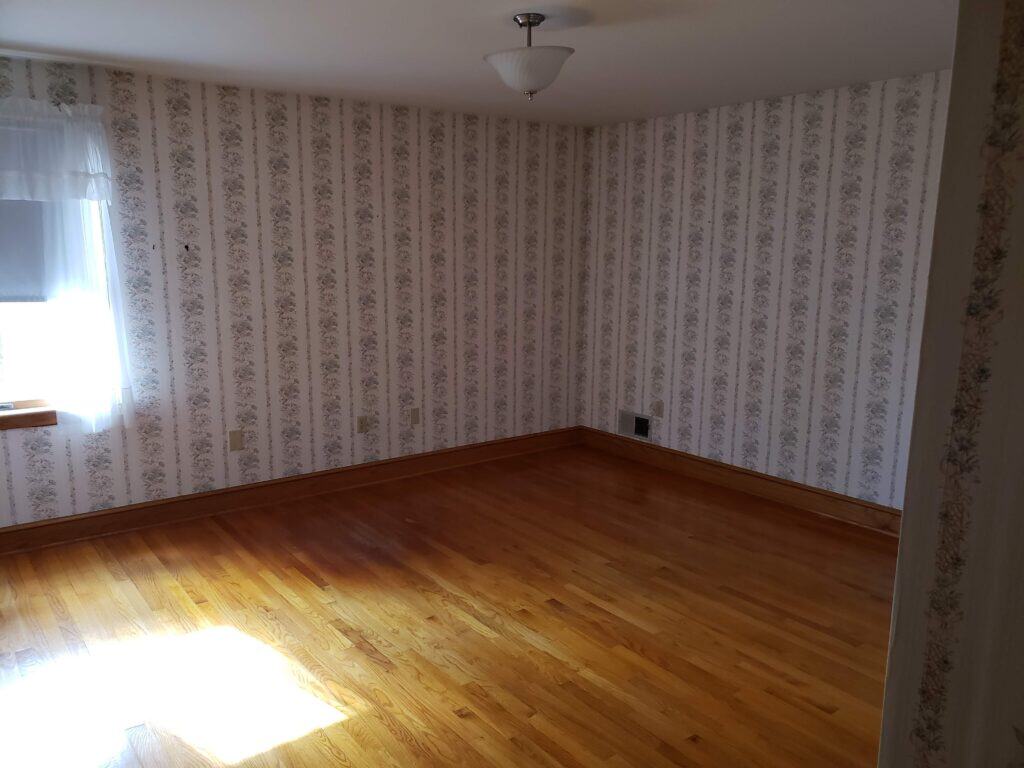
Before: Striped floral wallpaper and original hardwoods.
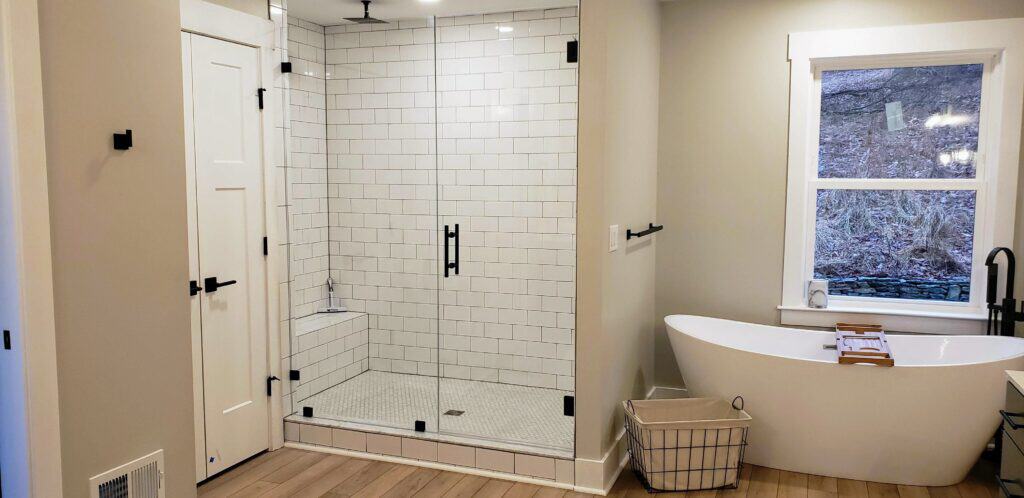
After: A walk-in glass shower with subway tile and a built-in bench, matte black hardware, and a freestanding soaking tub right by the window.
What I would tell you: Moving plumbing is where budgets can grow fast. Get real quotes before you fall in love with a new layout. We had the luxury of having a basement with a drop ceiling immediately below where all this needed to be installed. Cost saver for sure.
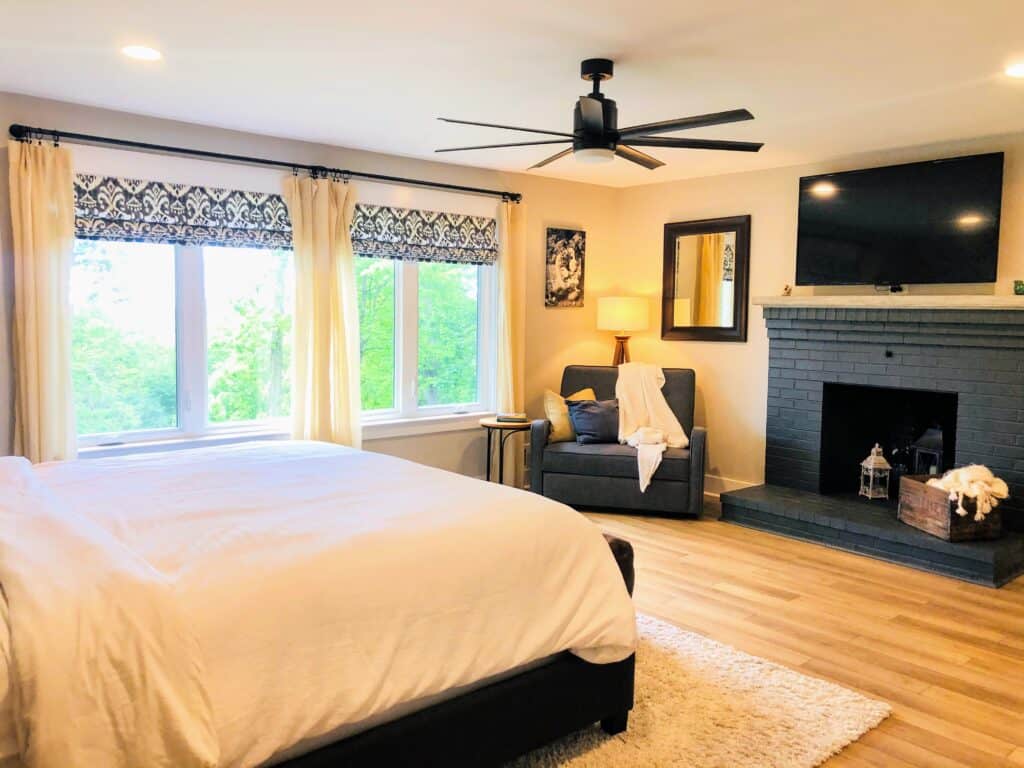
And the bedroom side? Closed off the arch to the foyer, added a door connecting the previous living room to the old master bedroom, and added an entry to the hallway. Fresh paint, new floors, and a painted brick fireplace. New lighting and curtains to finish it off.
The Entry: First Impressions Matter
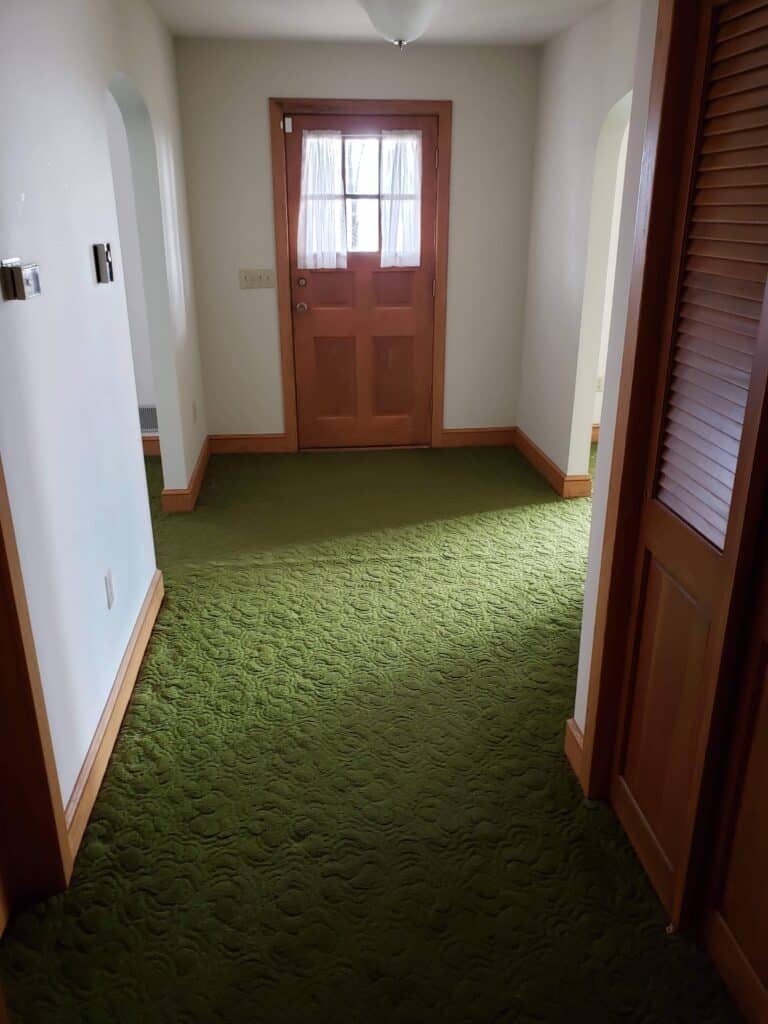
Before: Wall-to-wall green carpet right at the front door (who puts carpet at the front door?!) and a dark wood door.
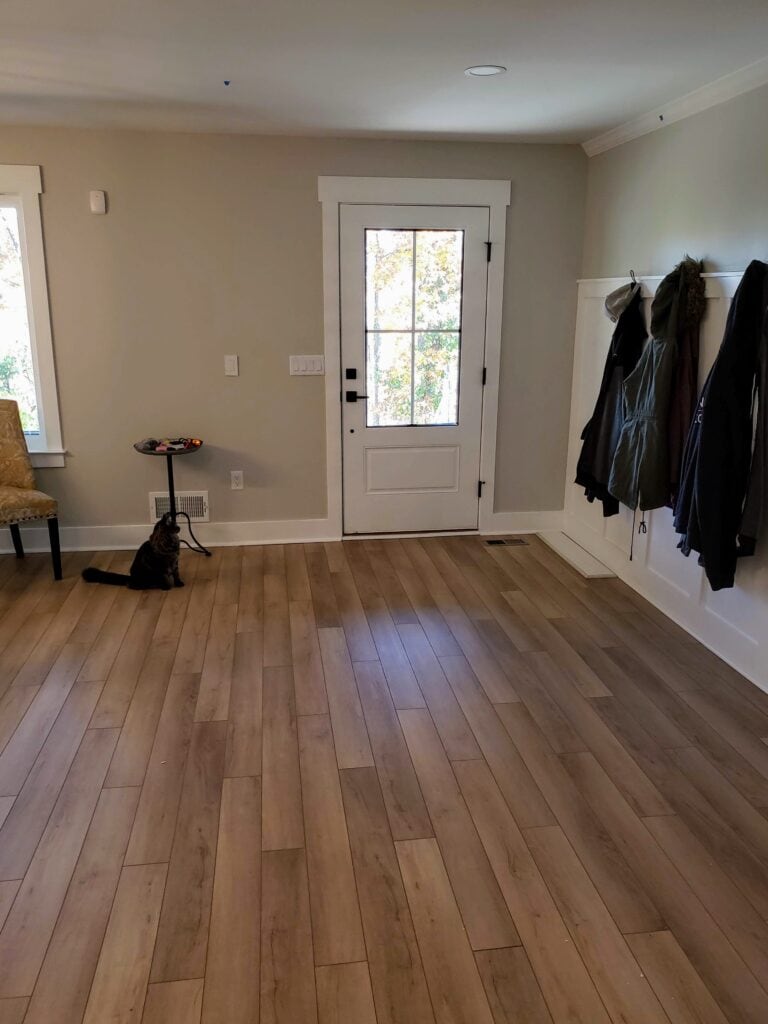
After: Luxury LVP floors, a bright white door with a window, and a handy spot for coats. Now it feels like the house is happy to see you when you walk in. (And yes, our cat approved. 🐈⬛)
The Little Things That Tied It All Together
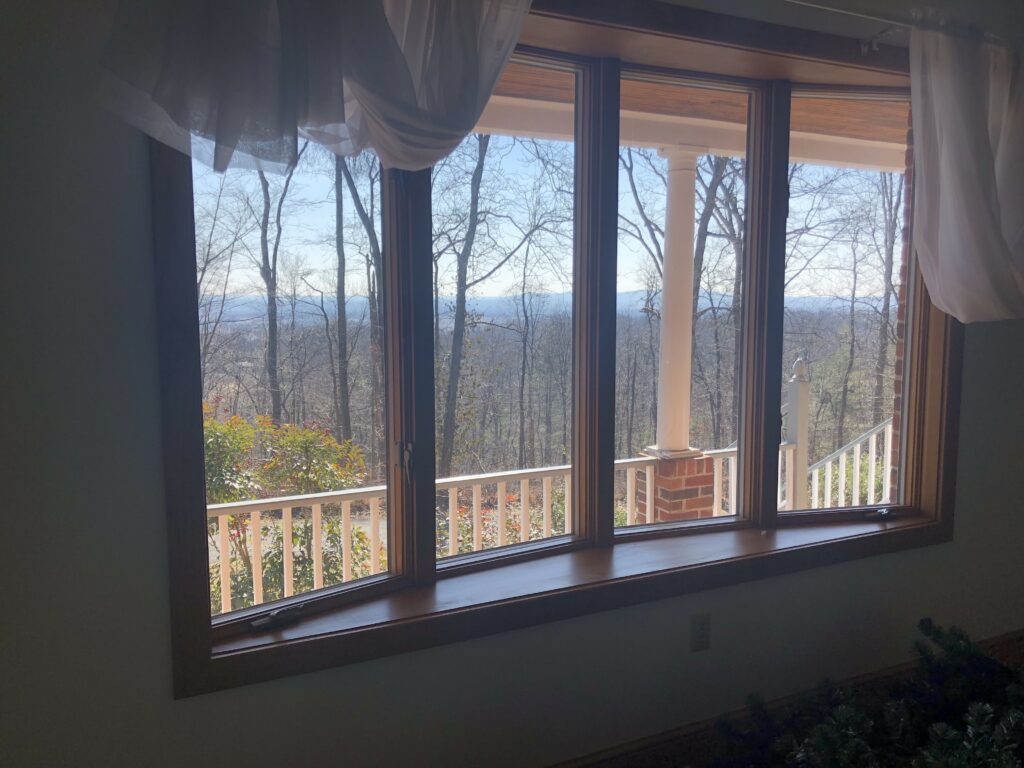
New flooring, fresh neutral paint, recessed lighting and bright white trim carried through the whole house, so every room feels like part of the same story. And the sunroom finally got to show off that wooded view. 🌳
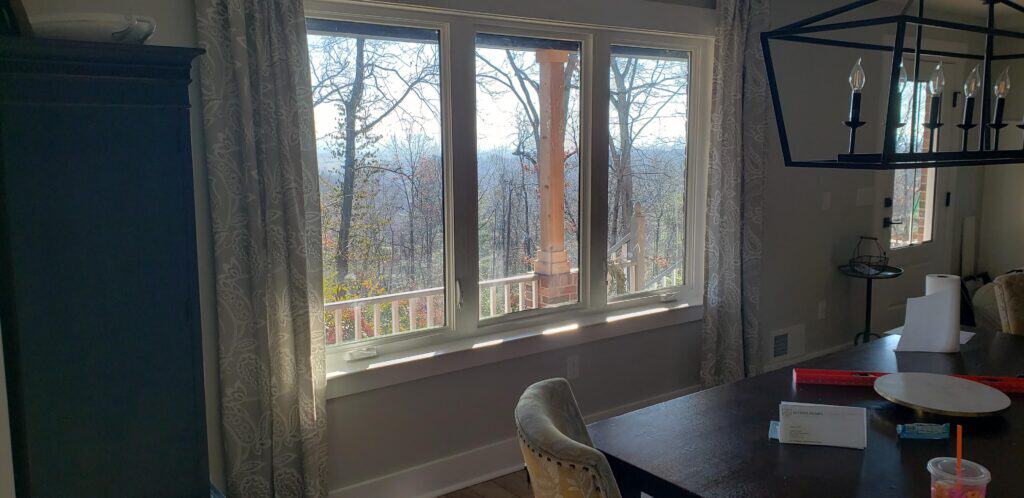
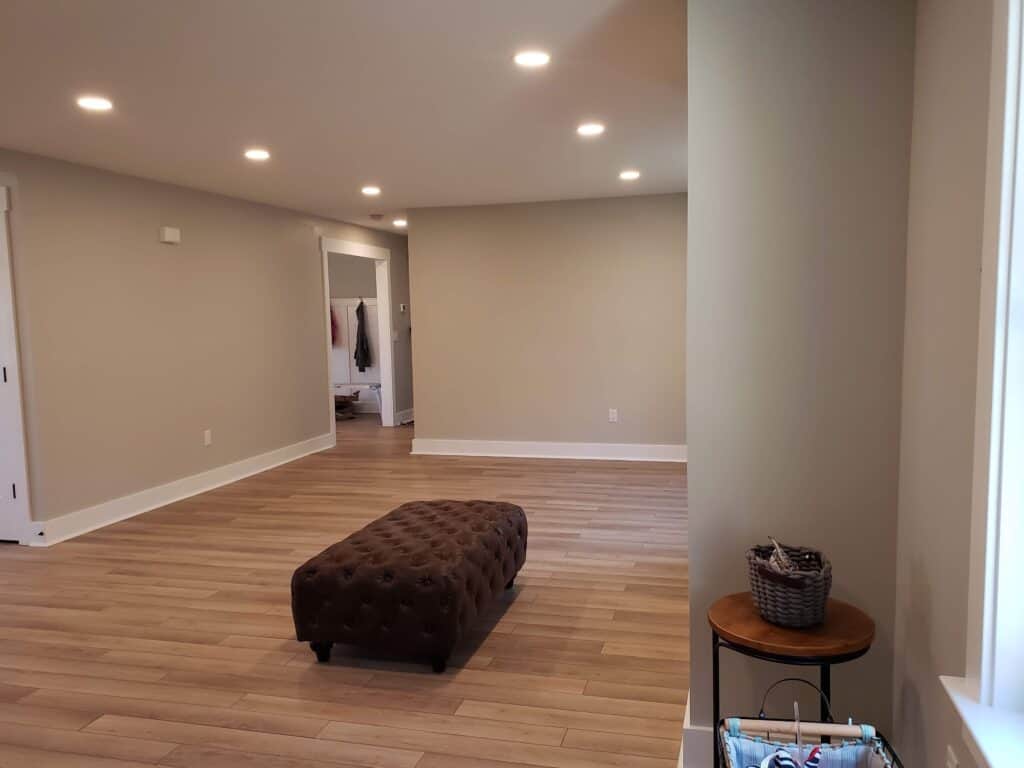
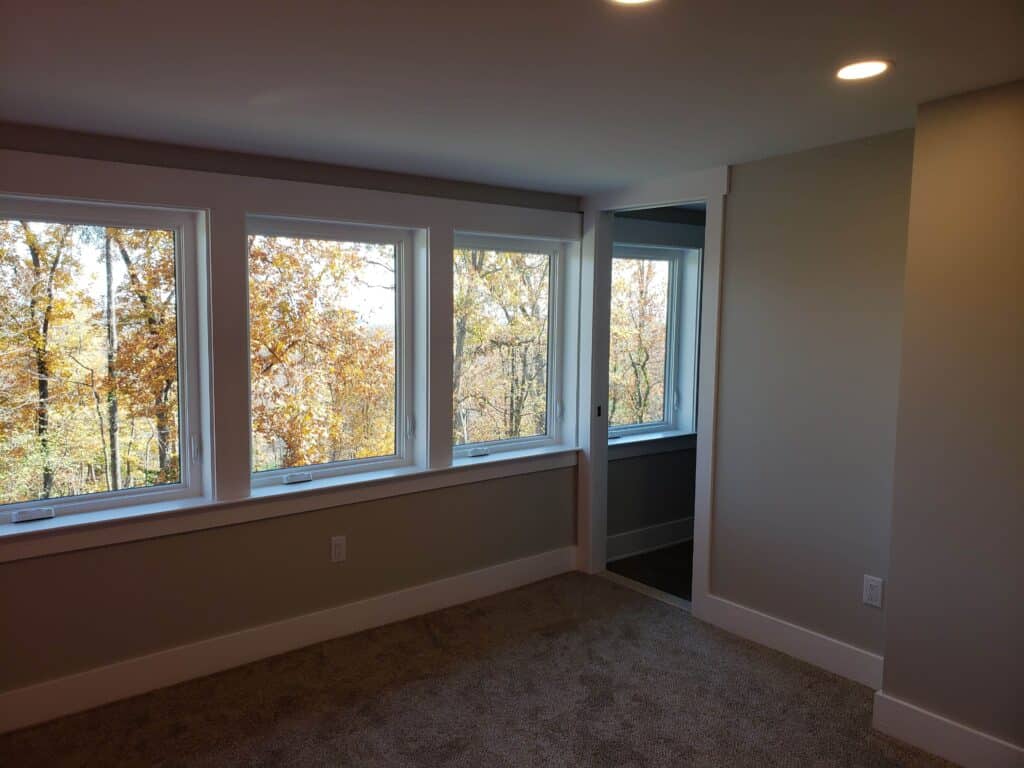
The Basement: Knotty Pine, Wood Stoves and a Whole New Level
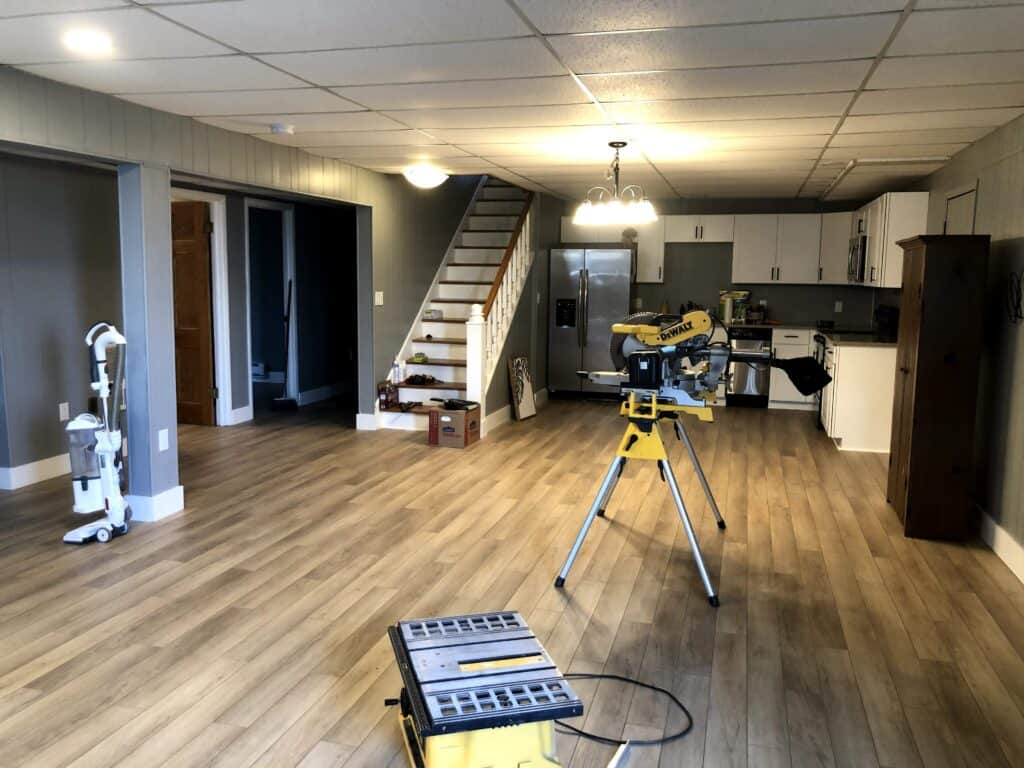
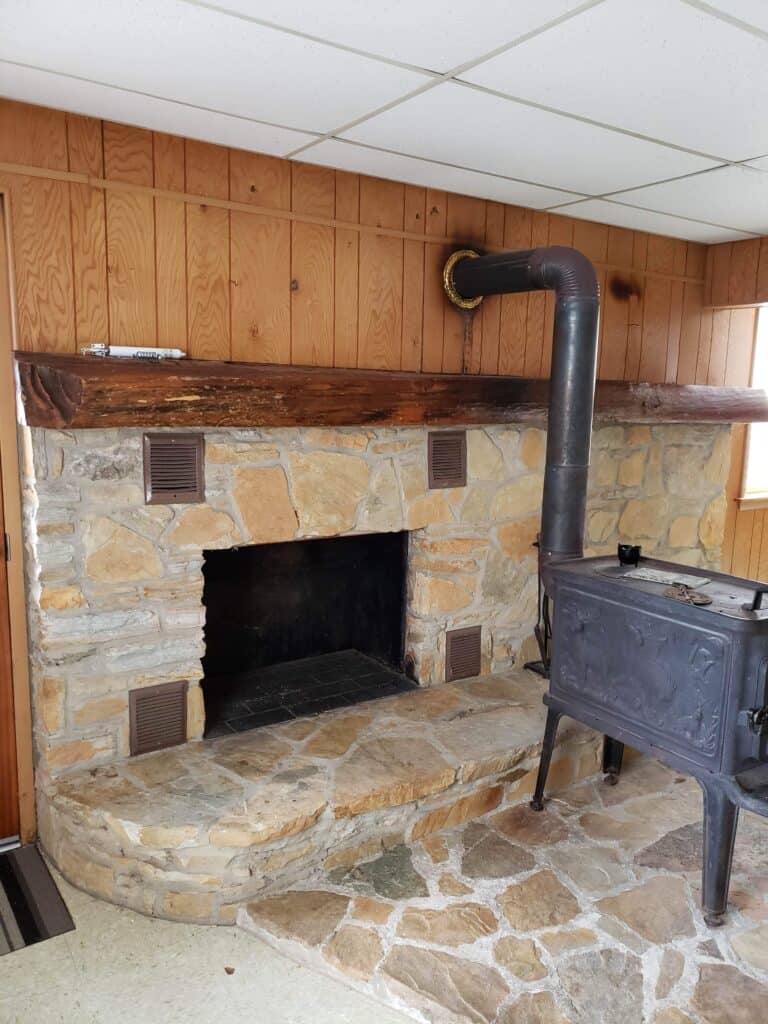
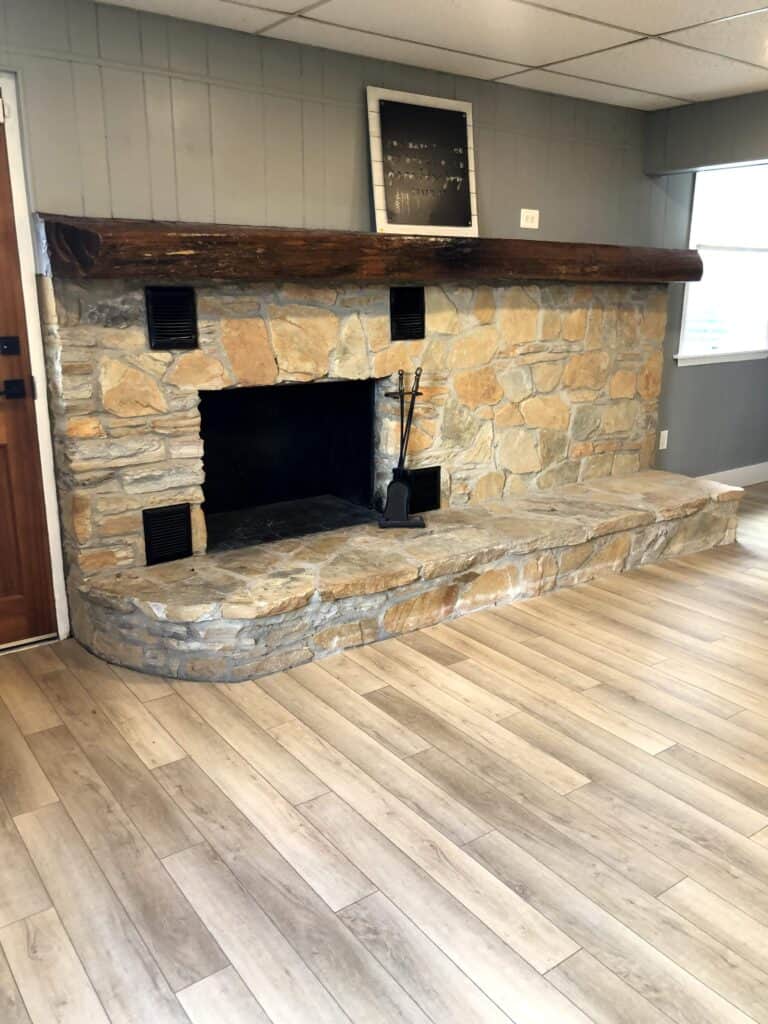
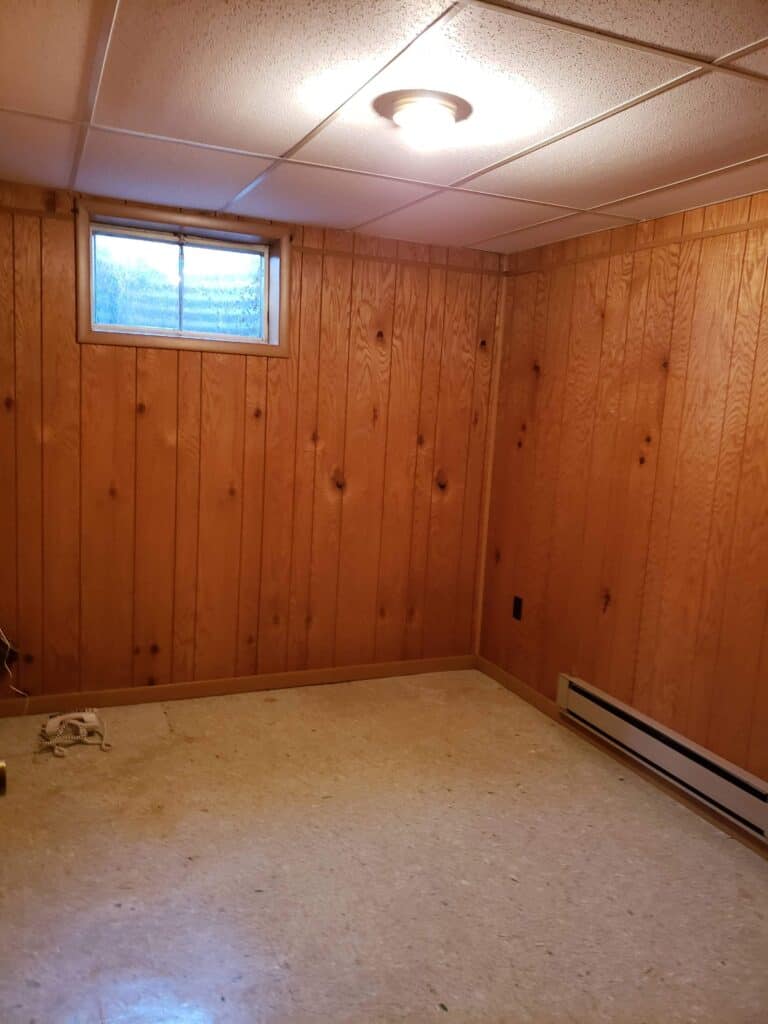
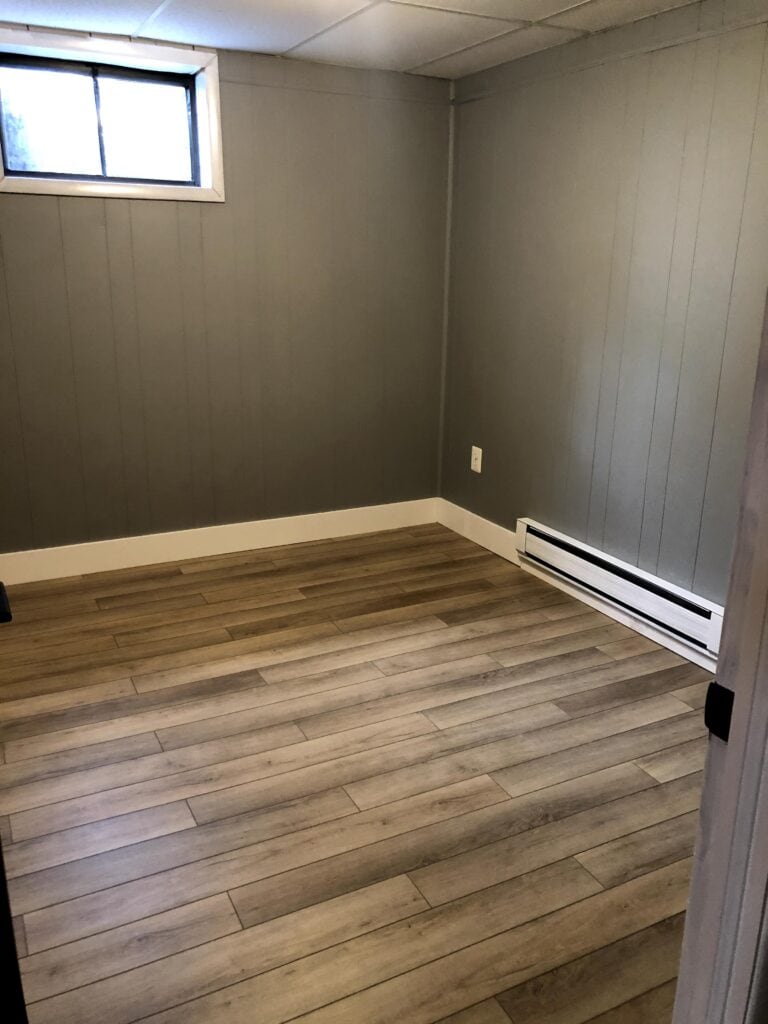
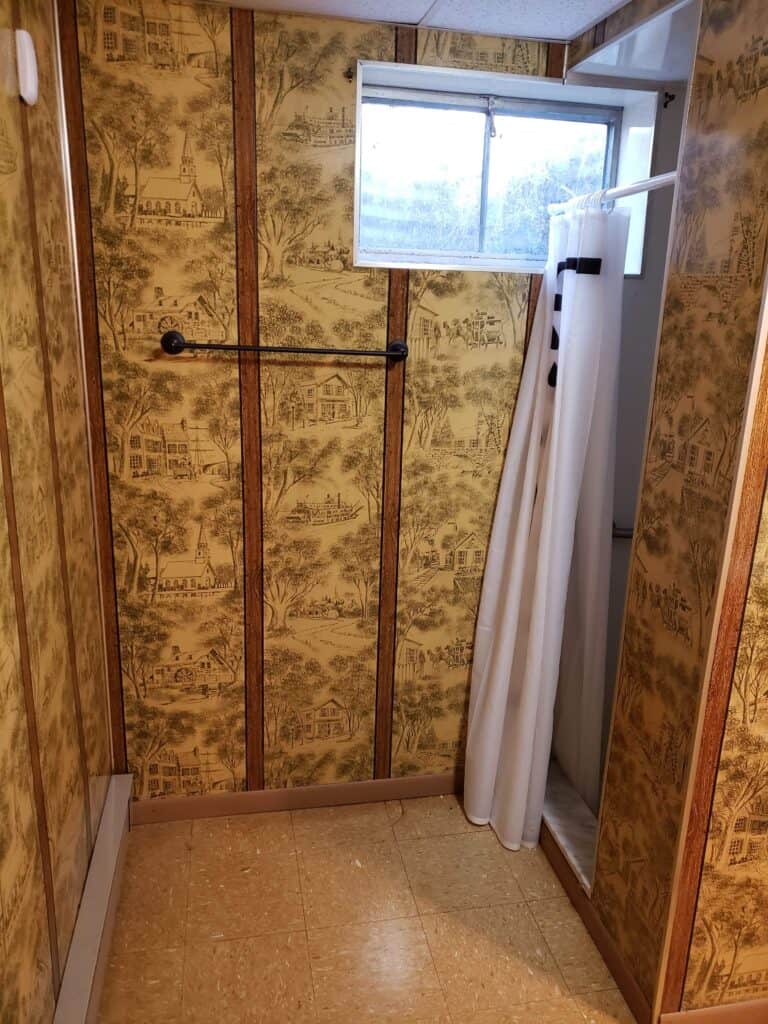
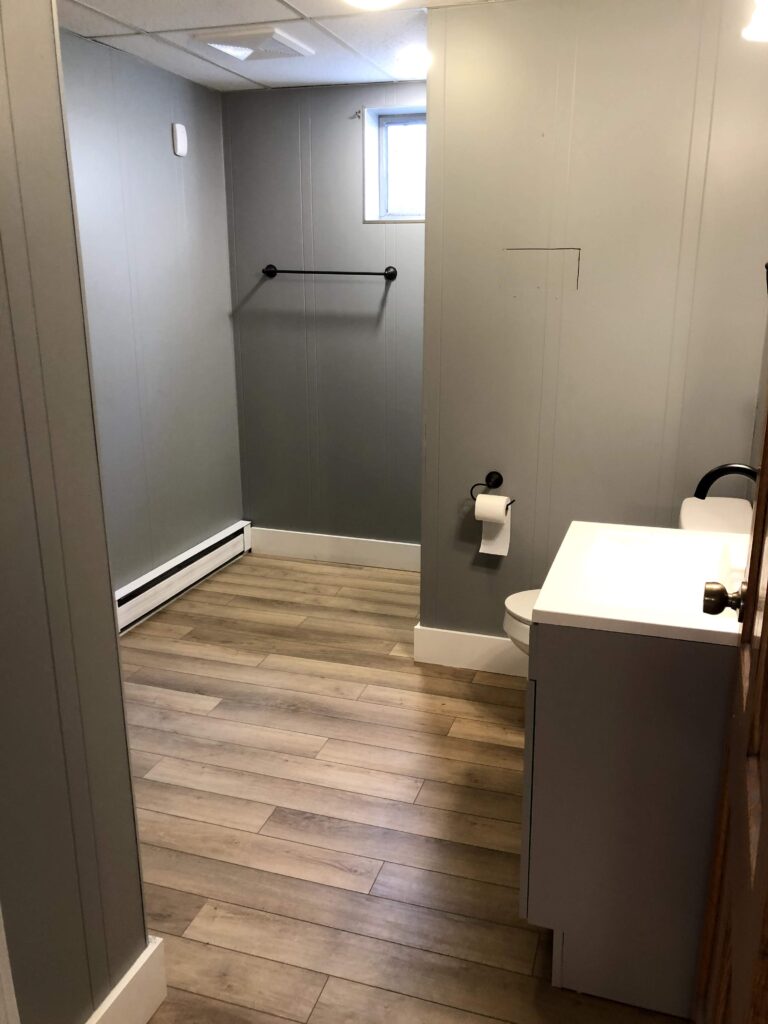
Down here it was peak 1970s: knotty pine paneling on every wall, drop ceilings, and not one but two ways to burn wood. 🔥 We painted out the paneling, put down the same Luxery LVP floors throughout, and turned it into a bright, usable living space.
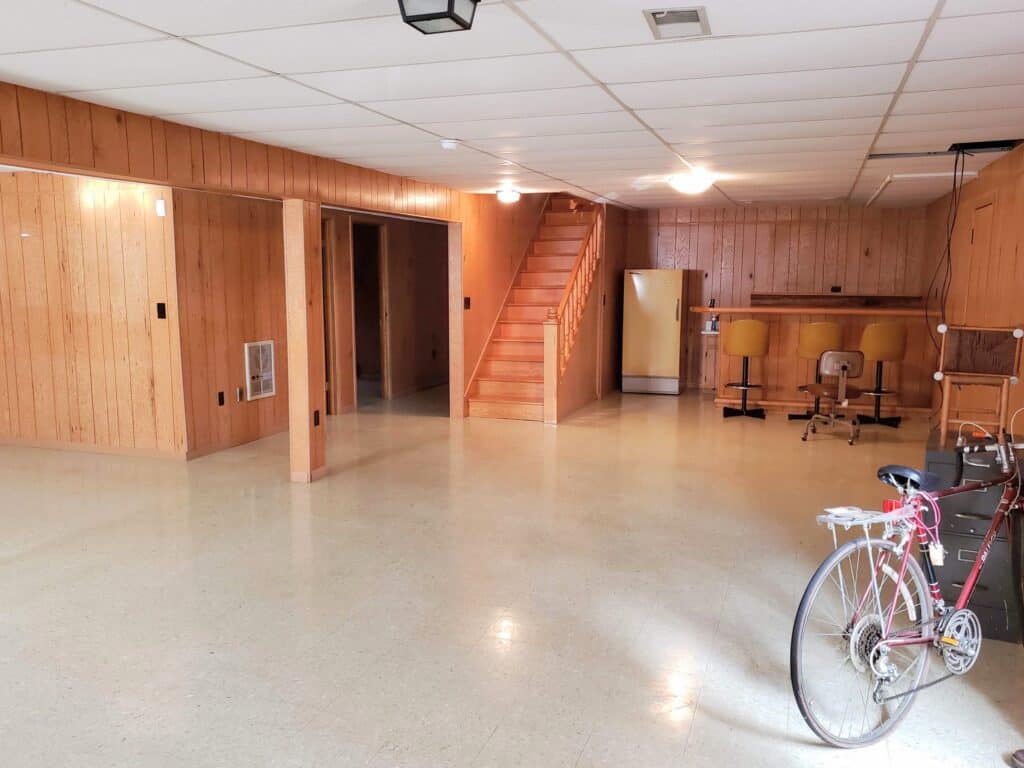
The fireplace: the wood stove went, the stone fireplace stayed.
The bedroom and bath: same paneling, same drop ceiling… totally different feel with paint, new floors, and some trim.
So… What Did It All Cost? 💸
Okay, this is the question I get asked the most, so let’s talk real numbers! Here is what our builder contract came to back in 2019:
| Original builder contract (May 2019) | $170,000 |
| Change order #1 (June 2019): plan tweaks, plus ¼″ drywall right over that striped floral wallpaper | + $11,105 |
| Final builder contract | $181,105 |
What that covered: Taking the roof off and framing the new attic dormers, moving and adding walls on the main level, new windows and a new front door, a brand-new HVAC setup (a new furnace plus two mini-splits for the attic), a propane tank, plumbing and electrical, insulation, drywall, all-new trim and interior doors, paint, and carpet and tile in the new spaces. Kitchen cabinets and countertops were included by allowance. The plan was about 120 days of work, with completion targeted for October 2019.
What it did NOT cover: Our wood-look floors, appliances, lighting and plumbing fixtures, built-ins, painting the brick fireplace, and final cleaning were all on us. So our true all-in number was higher than the contract. 😅
And see that change order? That’s the “renovations almost always cost more than the first plan” thing in real life. We added about 6.5% before the first wall even came down!
Keep in mind: these are 2019 prices for our project in Maryland, not a quote for your home. Costs have changed a lot since then, and every house, scope and contractor is different. If you are dreaming up a project here in the Cape Fear area, get current bids from licensed local contractors.
What This House Taught Me (and What I Tell My Buyers)
This renovation is a big part of how I look at homes today. When I walk through a house with buyers here between the river and the sea, I am always asking:
- Is it dated, or is it damaged? Wallpaper is a weekend. A roof or foundation issue is a different conversation. Here on the coast, check the flood zone and insurance picture before you fall in love, too.
- Can you see the bones? Light, layout, lot and location are much harder to change than finishes.
- Who is on your team? A great home inspector and licensed contractors are worth their weight in gold before you commit. Once it is yours, my annual home maintenance checklist helps keep it that way.
- What is your real budget and timeline? Renovations almost always take longer and cost more than the first plan, so build in a cushion. (If you are financing, start with getting pre-approved so you know your real numbers.)
- Can you live with “in progress”? Dust, noise and a stretch without a working kitchen are part of the deal. Make a plan for where you will live and eat while the work happens.
Not every buyer wants a project, and that is totally fine! But if a listing’s photos make you scroll right past, it might be worth a second look. (Thinking about selling a dated home instead? Here is how selling in Wilmington actually works.)
Frequently asked questions
How much did our 1970s rancher renovation cost?
Our builder contract came to $181,105: an original contract of $170,000 in May 2019 plus an $11,105 change order in June 2019. That covered the main level and the attic. Our true all-in number was higher, because floors, appliances, lighting and plumbing fixtures, built-ins, painting the brick fireplace, and final cleaning were on us.
What did the builder contract include in the rancher renovation?
It covered taking the roof off and framing the new attic dormers, moving and adding walls on the main level, new windows and a new front door, a new furnace plus two mini-splits for the attic, a propane tank, plumbing and electrical, insulation, drywall, trim, interior doors, paint, and carpet and tile in the new spaces. Kitchen cabinets and countertops were included by allowance.
How long was the 1970s rancher renovation scheduled to take?
The builder’s plan was about 120 days of work, with completion targeted for October 2019. Before any demolition, we had an architect draw up plans for the main floor and the attic.
What did the attic conversion add to the house?
On paper, the plan turned an unfinished storage attic into three new bedrooms with two new full baths plus a loft. The roof came all the way off so new dormers could go up. Attic conversions involve structure, insulation, ceiling height, egress and permits, so talk with a licensed contractor and your local permitting office first.
Do these renovation costs apply to a home in Wilmington NC?
No. These are 2019 prices for our project in Maryland, not a quote for your home. Costs have changed a lot since then, and every house, scope and contractor is different, so get current bids from licensed local contractors in the Cape Fear area.
Thinking About a Fixer-Upper?
I love this stuff. 💛 If you are house hunting in the Wilmington area and wondering whether a “needs updating” home could work for you, let’s talk! I will help you look past the carpet and figure out what is real.

📞 910-983-8963 · 🌐 makingilmhome.com · 📸 @theILMrealtor
I’m a REALTOR®, not a contractor, lender or attorney. This post shares our personal renovation experience and is not construction, financial or legal advice. Please talk with licensed professionals and check your local permit requirements before starting a project.
Tabetha Klein, REALTOR® | Coldwell Banker Sea Coast Advantage. Each office is independently owned and operated. Equal Housing Opportunity.